How to Repair Recessed Downlight Holes on Stretch Ceiling/Gypsum Ceiling
By SmartGlow
April 17th, 2026
How to deal with the holes left on the ceiling after replacing or removing the recessed downlights? This article will teach you three practical methods, from quick covering to gypsum board repair, to easily solve the problem of recessed downlight ceiling hole defects and create a clean and tidy top effect.
In the previous guide, we taught you how to improve the delicacy of the ceiling with low-cost renovation by replacing the recessed downlight frame. But if you're not just facing issues with the appearance of the lighting fixtures, but rather the unsightly holes left on the ceiling by replacing or removing old ones, then this guide is specifically designed for you.Whether it's the traces left by past renovations, mistakes in drilling tools, or the removal of old downlights that are no longer needed, the holes in the recessed downlight ceiling will always destroy the overall beauty of the ceiling. Don't worry, repairing the downlight hole is not complicated. From quick covering to perfect repair, we will teach you step by step.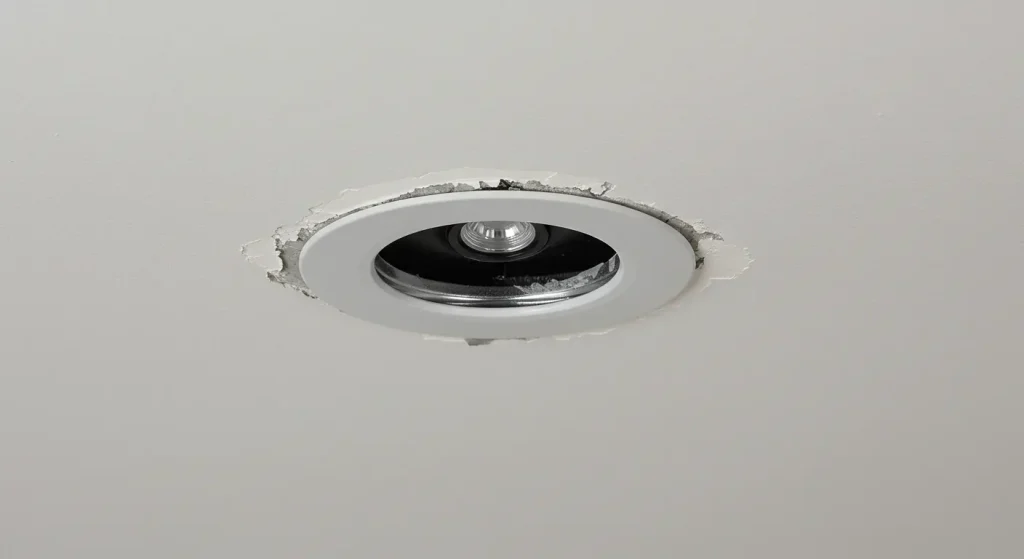 This is a complete expert guide that teaches you how to repair downlight openings on ceilings, whether it's gypsum ceilings or stretch ceilings. We will provide you with a detailed breakdown of the three most effective solutions and provide clear and easy to understand step-by-step tutorials for each solution to help you easily address any flaws in the recessed can downlight ceiling.
Clarify your goals first, and then choose the right planThe most crucial step before picking up any tool is to think clearly about what you want to do with this hole. Your goal will directly determine the most suitable repair method for you, especially on ceilings made of different materials, where the treatment methods may vary
- Goal 1: Install a smaller new downlight in the existing large hole. This is the most common scenario in upgrading and renovation: for example, if you want to replace the old 5-inch/6-inch large-sized downlight with a modern and smaller 3-inch/4-inch mini recessed downlight, but the original hole size is too large and needs to be adapted.
- Goal 2: Completely eliminate holes and restore a flat ceiling. If you plan to completely remove old lighting fixtures and no longer install any recessed downlights, but want the ceiling to be restored to a smooth and flat surface like it has never been perforated.
- Goal 3: If you don't want to make a big deal, quickly cover the holes with a cover plate. If you don't want to repair a large area temporarily but want to quickly cover the defects, you can use a dedicated blank cover plate or decorative piece to directly cover the old downlight holes, which is simple and practical.
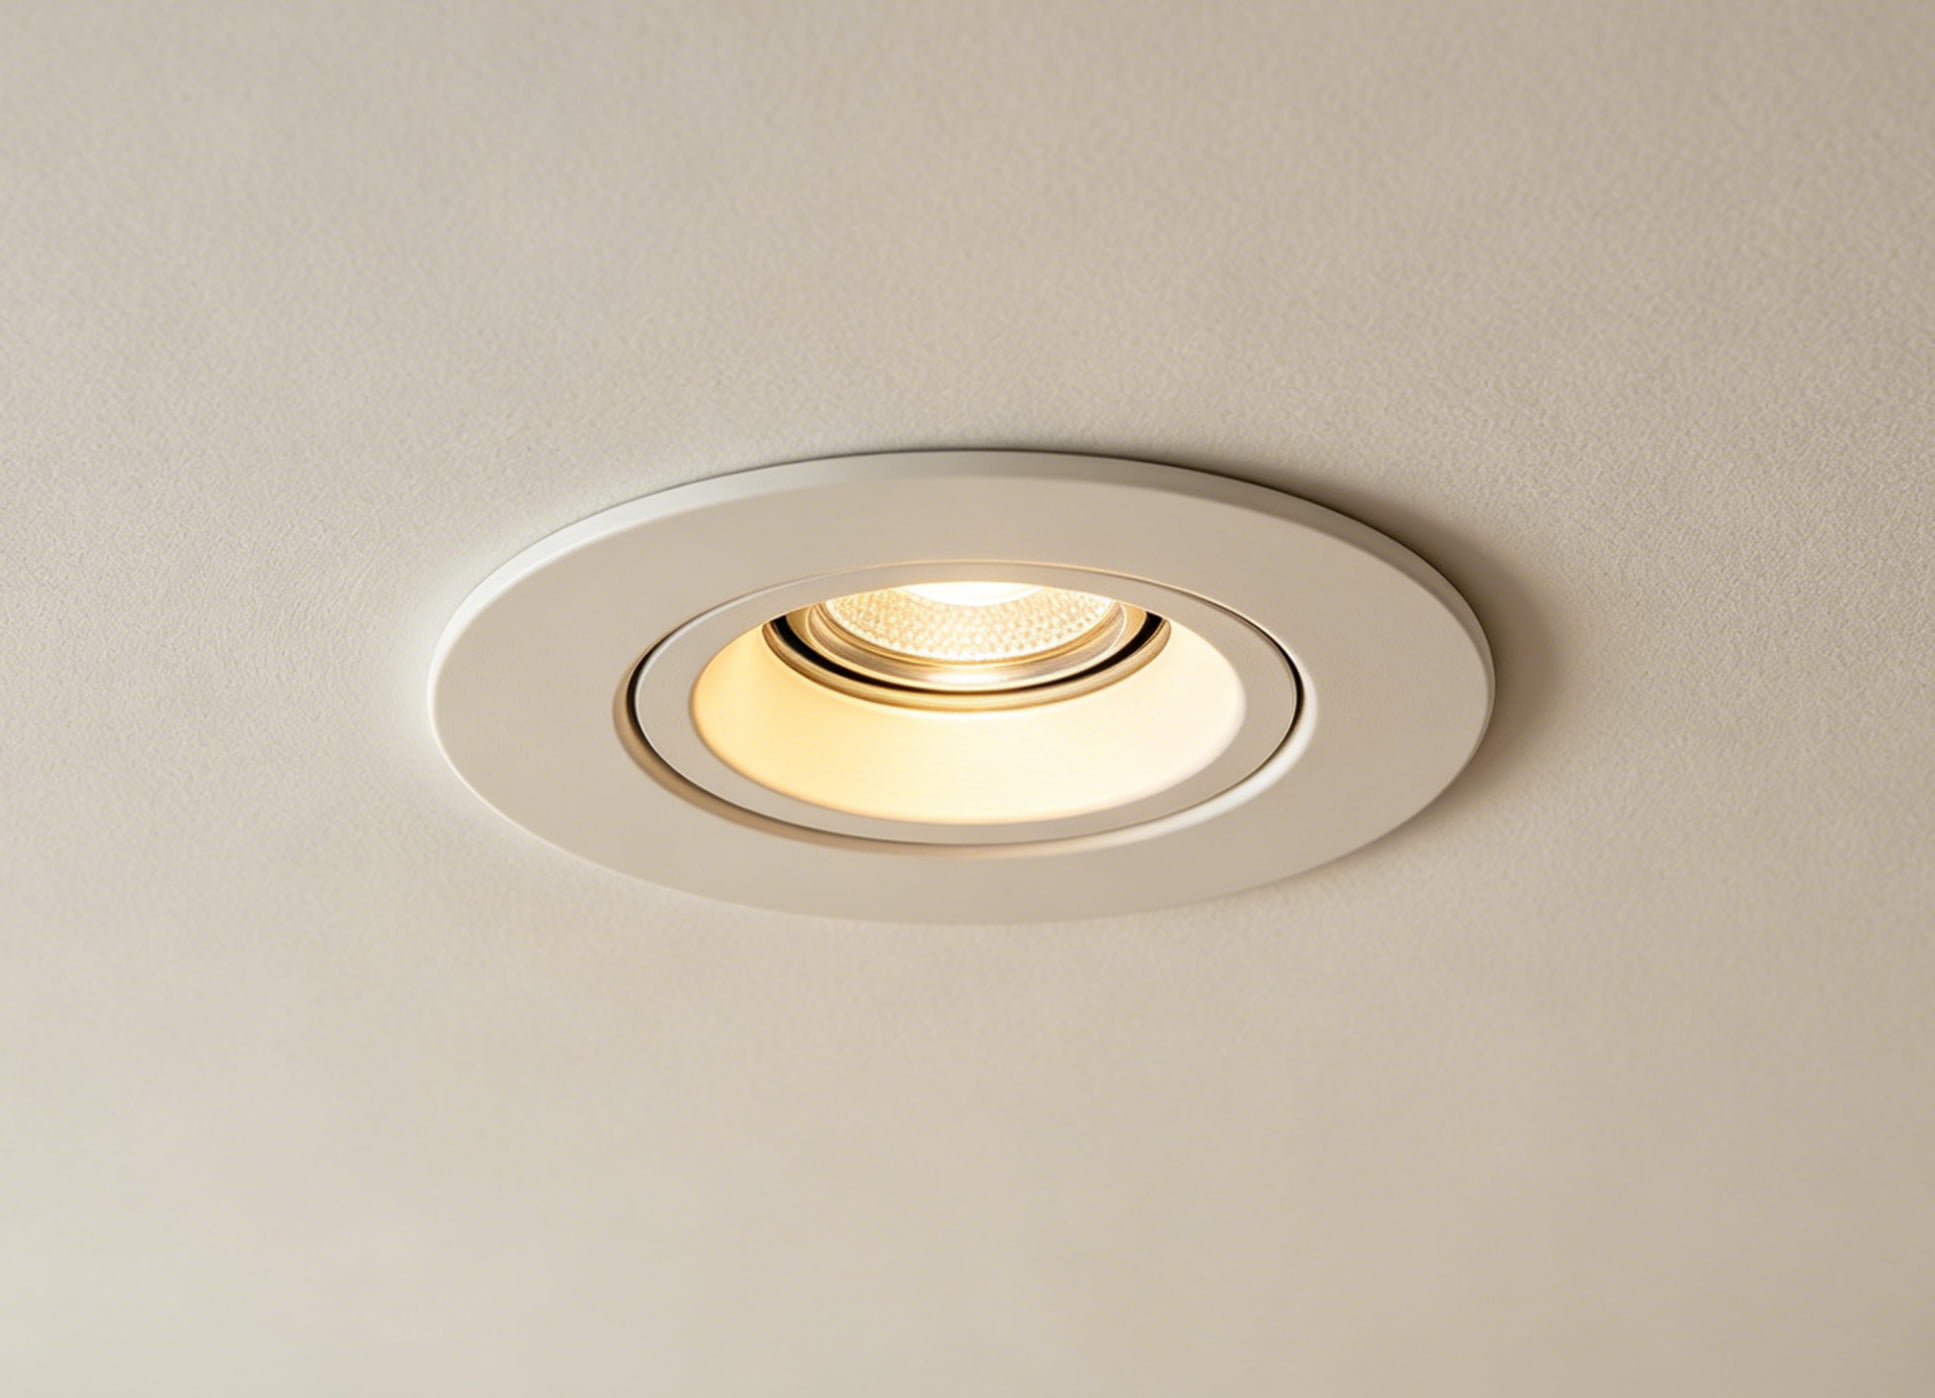
Next, we will step by step break down the specific methods for achieving each goal.Option 1: Install small downlights in large holes (universal solution for gypsum ceiling/stretch ceiling)You finally chose your desired new LED recessed can downlight, but found that the ceiling holes left by the old light fixtures were too large and did not match the size of the new downlight? Don't worry, this is the most common challenge in renovation, and the "Goof Ring" is the secret weapon of professionals, which can help you easily solve this problem and avoid complex ceiling repair work.
What is Google Ring?Correction ring (also known as reduced diameter decorative ring, oversized decorative ring) is a flat metal or plastic ring specially designed to solve the problem of excessive hole opening in downlights. Its design logic is simple: it is placed on a new small downlight, extending outward to cover the edge of the oversized hole, making the gap between the lamp and the ceiling disappear. This method is applicable to both gypsum ceiling and stretch ceiling, and does not require any damage to the original top structure.Gypsum ceiling: Goof ring can be directly pressed onto the surface of gypsum board to cover the burrs and gaps of openings, without the need for putty or painting.Stretch ceiling: The specialized flexible goof ring can adhere to the membrane surface without damaging the stretch membrane or damaging the overall tension of the ceiling.Step by step guide: Use a correction ring to fit the size hole
- Safety priority: Even if only installing accessories, please first turn off the circuit breaker of the corresponding circuit to avoid the risk of electric shock when cutting off the power supply.
- Accurate measurement: You need to record two key dimensions: the diameter of the existing holes on the ceiling and the outer diameter of the new recessed downlight decorative cover.
- Choose a compatible Google ring: Choose a Google ring with an inner diameter slightly larger than the new downlight decorative cover and an outer diameter larger than the existing hole. There are various sizes and finishes available on the market (white, matte black, brushed nickel, etc.), which you can match according to the style of the lighting fixtures and ceiling.
- Gypsum ceiling: Standard goof ring with optional metal or hard plastic materials.
- Stretch ceiling: It is recommended to choose a special version with soft rubber edges to avoid scratching the film surface.
- Install new downlight: Follow the product instructions to wire and install the new small downlight into the ceiling hole. It will come with a spring clip fixed in the center of the hole, which will not be affected by large-sized openings.
- Insert the Goof Ring: After completing the seam covering, slide the correction ring from the front of the downlight and tightly adhere to the ceiling surface. It will naturally cover the gap between the new downlight and the old hole, making the top surface look clean and neat.
Restore power supply, check the effect. Connect the power supply, light up the lamp, and you can see the perfectly matched recessed downlight ceiling effect, and the old hole defects will completely disappear.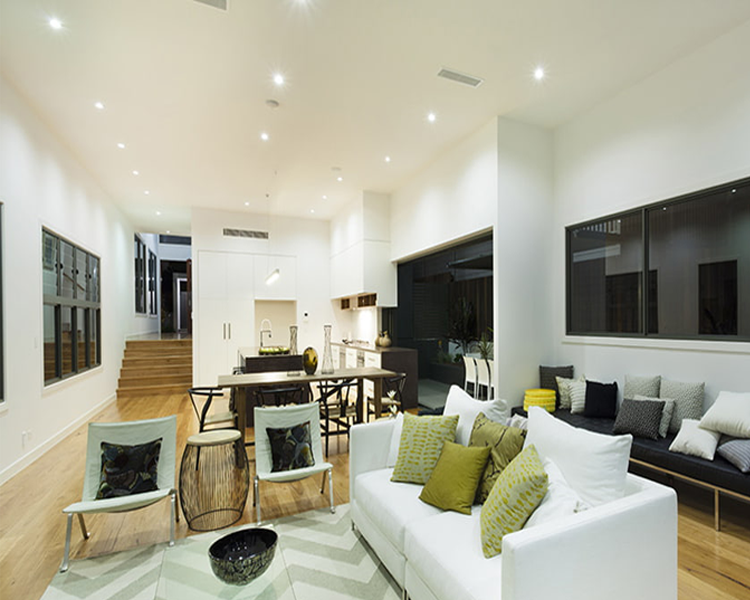 Option 2: Completely eliminate the downlight holes and restore a flat ceilingIf you plan to completely dismantle the old recessed can downlight and no longer install any lighting fixtures, and want the ceiling to be restored to a smooth and flat surface like it has never been perforated, then you need to choose the corresponding seamless repair plan based on your ceiling material. The repair logic of gypsum ceiling and stretch ceiling is completely different. Below are the step-by-step operations for dismantling the two materials.Gypsum ceiling: complete repair processThe most common method for repairing downlight holes in gypsum ceilings is to use gypsum board, putty, and paint to completely eliminate the holes.Required tools and materials: gypsum board small pieces (same thickness as the original ceiling), self tapping screws, L-shaped metal support strips, joint/mesh strips, putty powder (for batch embedding), sandpaper (120 mesh+240 mesh), primer, topcoat (same color as the original ceiling)Step by Step Guide
- For safety measures, first turn off the power supply of the circuit breaker, remove all wires and metal bases of the old downlight, and clean the damaged gypsum at the edge of the hole.
- Install support and patch plates to fix L-shaped metal support bars on both sides inside the hole, then insert the cut gypsum board pieces into the hole and fix them on the support bars with screws to ensure they are flush with the original ceiling.
- Joint reinforcement is achieved by applying joint tape at the joint between the patch and the original ceiling to prevent cracking in the future.
- Apply 2-3 batches of putty evenly: first apply the embedded joints and screw holes, and then polish them after drying; Scrape and level the entire area, allowing the repaired area to transition naturally with the original ceiling.
- Polish and paint with 240 grit sandpaper until smooth, first apply a layer of primer, then apply a topcoat of the same color as the original ceiling. After drying, there are almost no visible repair marks.
Stretch Ceiling: seamless repair solutionThe membrane surface of the stretched ceiling is a whole PVC or polyester film, which cannot be partially repaired like gypsum board. Therefore, the repair method is more special, and the core is "local replacement" or "special hole blocking kit".
Option A: Local membrane surface replacement (optimal effect)
- Contact a professional manufacturer to repair the stretched ceiling, which requires specialized equipment. Contact the manufacturer who installed it initially, provide the material, color, and model of the membrane surface, and customize a small piece of spare membrane surface in the same color.
- Professional personnel will use a hot air gun to heat and remove the local film surface around the hole to soften it, and then carefully remove the old film surface in certain areas.
- Welding/splicing of new film surface: The new spare film surface is seamlessly spliced with the original film surface through hot welding process, and then re fixed on the stretched ceiling aluminum profile. Finally, it is cooled and shaped, and the surface hardly shows any joints.
Option B: Specialized hole blocking kit (fast and low-cost)If you do not want to replace the membrane surface extensively, you can use a dedicated stretching ceiling plug kit:
- Clean the edges of the holes to ensure that the membrane surface is not damaged.
- Fix the base of the kit onto the keel from the back of the hole, and then fasten the decorative cover on the surface with the same color as the film surface to quickly cover the hole.
- Note: This method is suitable for holes with smaller diameters and can only achieve "visual masking", and cannot achieve complete invisibility.
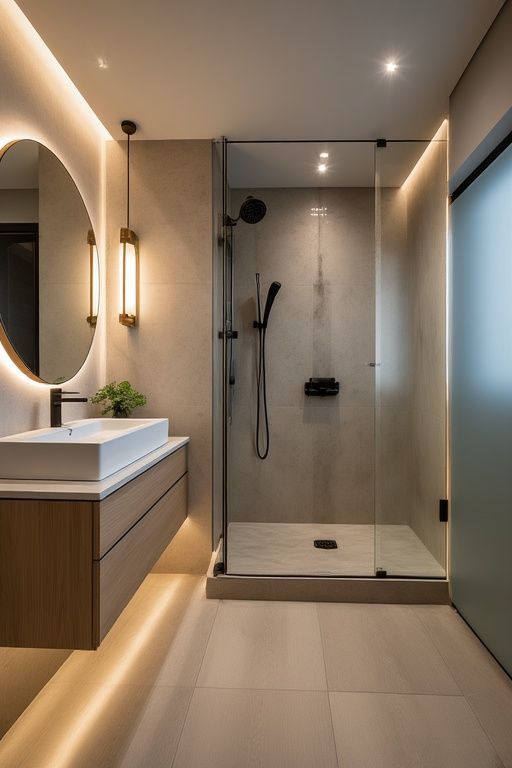
Option 3: A Fast and Creative AlternativeIf you feel that scraping gypsum board and replacing stretch film are too difficult and do not want to invest too much time and effort, you may want to try these more fashionable and convenient alternative solutions, which can perfectly cover the downlight holes and add a sense of design to the space.Option A: Use decorative ceiling panelsCeiling decorative panels were originally commonly used to decorate around chandelier bases, but modern minimalist decorative panels are also an excellent choice for covering downlight holes - not only can they perfectly cover the holes, but they can also add exquisite architectural details to the room, making the ceiling no longer monotonous.Gypsum ceiling: Choose metal or wooden decorative plates, fix them directly on the ceiling with expansion screws, fit tightly and firmly, and can choose matte, brushed or wood grain finishes according to the decoration style, echoing the style of the recessed downlight frame.Stretch ceiling: Choose lightweight and flexible decorative plates, use dedicated seamless adhesive or magnetic fixation to avoid damaging the tension of the stretch film, match the color of the film surface, achieve visual unity, and avoid abruptness.
 Option B: Install larger surface mounted lighting fixturesThis is the most practical and worry free masking method, which does not require any repairs and can directly "cover" old holes with new lighting fixtures. Replace the original embedded downlight with a stylish surface mounted light fixture. As long as the base size is larger than the old downlight hole, it can completely cover the defects and upgrade the space lighting effect.Adaptation scenario: Whether it's gypsum ceiling or stretched ceiling, it can be easily applied without worrying about material limitations.Recommended styles: slim LED round ceiling light, minimalist decorative pendant light, track lighting system, or retro style semi suction ceiling light, which can cover holes and match different decoration styles such as minimalism, light luxury, and industrial style. Paired with LED recessed downlight peripheral lighting fixtures, it creates a unified lighting atmosphere.Option C: Use a "blank" cover plateThis is the simplest, most aesthetically pleasing, and safety compliant solution, and also the preferred choice for lazy people. Blind plate is a flat non-metallic disc specifically designed to cover unused electrical openings, requiring no complex construction, easy installation, and perfect integration with ceilings.Gypsum ceiling: Choose white blind panels that can be painted, and after installation, touch up the paint according to the color of the ceiling without any visible traces; Fixed by spring buckles or screws, it is firm and not easy to fall off, and can effectively cover holes and debris inside the holes.Stretch ceiling: Customized size flexible blind plates are selected, fixed with magnetic suction or seamless buckles, without damaging the film surface, with a smooth and flat surface that can match the color and texture of the stretch film, maintaining the cleanliness of the recessed can downlight ceiling top surface.Choose the solution that suits you: Comparative analysis
| Solution |
Best For... |
Skill Level |
Final Outcome |
Estimated Cost (USD) |
Time Required |
| Correction Ring / Goof Ring |
Installing a new, smaller LED recessed downlight in an oversized ceiling hole without drywall repairs. |
Beginner |
Clean, professional finish with the ring neatly covering the gap between the new trim and the old hole. |
Low: $2–$10 each |
10–20 minutes |
| DIY Drywall Repair |
Completely removing an old recessed downlight to restore a smooth, unblemished ceiling. |
Intermediate (DIY-friendly) |
The hole is fully eliminated, leaving a seamless, “like-new” ceiling. |
Medium: $10–$30 (materials only: drywall, compound, paint) |
1–2 days (includes drying/curing time) |
| Professional Drywall Repair |
Having the ceiling patch completed by a pro without DIY work. |
Professional (contractor work) |
Smooth, near-invisible repair with minimal signs of patching. |
Medium-High: $80–$150 per hole (labor + materials) |
2–4 hours (excluding drying wait time) |
| Stretch Ceiling Professional Repair |
Removing a recessed downlight from a stretch ceiling for a seamless, invisible fix. |
Professional (specialist required) |
The membrane is restored to a uniform, seamless finish with no visible joins. |
High: $50–$200+ per hole (varies by size and process) |
1–3 days (includes consultation and on-site work) |
| Creative Cover-Up (Decorative Medallions / Surface Lights / Blank Covers) |
Quick, low-effort concealment without major repairs, while adding a design touch. |
Beginner |
The hole is hidden behind a new fixture or decorative element, blending practicality with style. |
Low-Medium: Blank cover $3–$8; medallion/light $10–$60 |
10–30 minutes |
 ConclusionThe holes left by the old downlights on the ceiling do not need to become permanent flaws in your design. As you can see, you have a variety of flexible solutions to choose from - whether it's clever and simple correction rings, satisfactory seamless gypsum board/stretch ceiling repairs, or aesthetically pleasing and creative covering solutions, all of which can help you easily repair recessed downlight holes.Repairing old holes is just the first step in creating an ideal space. If you need help planning a new lighting layout or selecting suitable accessories for LED recessed downlight upgrades, SmartGlow's lighting expert team can provide one-on-one professional support, from lamp selection to installation details, to ensure that your space is not only repaired, but also refreshed through a brand new lighting solution.Contact us immediately for professional consultation and work together to create the perfect ceiling of your dreams.
Previous
Recessed Downlight Frame Adaptation, Disassembly, and Installation Guide
Read More
Next
4 Best Solutions for Installing Recessed Lighting in The Kitchen
Read More


